TABLE OF CONTENTS
With DAKboard, customization is key. We like to make sure our users can get what they want out of their displays, and with that in mind, we have added a lot of new fonts, as well as keeping the old methods to put your custom fonts in place. For your Predefined Screen, your font controls will be located under the Defaults tab of your Screen editor and will affect the entire screen. For Custom Screens, you can control your fonts per block. To see how to do this, check out the details below.
Font Selector:
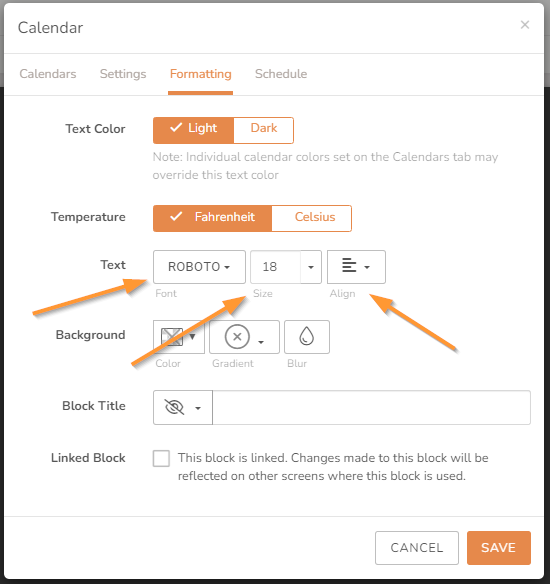
Hundreds of new fonts are now available to be applied to Custom Screen blocks! The new font selector may be found under the Formatting tab of any text-based blocks. With the list being so large, we offer to filter on up to five types: Serif, Sans Serif, Display, Handwriting, or Monospaced. Just open your Block Editor, click on the Formatting tab, click the Text dropdown, and select More Fonts...:

Additionally, the names of fonts may be searched by entering text into the Search for fonts… field. Once a font is selected, the “Lorem ipsum” sample text below the selector will change to display an example of what the font will look like:

Of course, font size, color, and alignment options will also still be available for tailoring its appearance. The standard font selector will remain with a short list of the popular fonts we have always offered:

Add a Custom Font to your Screen:
With the Styles block and the Custom CSS Rules, you can add any internet-hosted font that you like to your
DAKboard screen. Just find an online Free Font Library of your choice and use the following steps:
Find a Font you like in your free library. In our example, we are using https://fontlibrary.org/. Open the font you want to use, find the URL to the font, and copy it. Be sure to only copy the URL and not the rest of the information. See the highlighted example below:

Go to your Screen you want to add the custom font, click the Styles dropdown, and open the ADD CUSTOM CSS RULE section seen below:

Add the URL inside this block using the "@import URL" code as seen below:

Next, copy the font-family line from your Font Library. See below:

Back in DAKboard, on a new line, type “#screen-container-live, #screen-container-no-edit {” then paste in your font, and add a closing bracket: “}”. The entire code can be seen below:

The entire entry should look something like this:
@import URL ('https://fontlibrary.org//face/futura-renner');

#screen-container-live, #screen-container-no-edit {
font-family: 'FuturaRennerRegular';
font-weight: normal;
font-style: normal;
}
Once completed, your Screen will have the custom fonts as seen below:

Frequently Asked Questions:
Below are the most Frequently Asked Questions about the Font Selector and Custom Fonts.
Can you change the Font Colors on a Free Account?
This depends. With the authenticated accounts from Microsoft and Google, the calendar colors will show as Font Colors for events that are not all day. However, ICS/iCal calendars do not share this data, so we cannot select the colors for you. The rest of the fonts have no way to edit the colors on the Predefined Screens.
Helpful Articles:
Having trouble? See if these articles help.
How to Use the Custom Screen Live Editor
How to Use the Predefined Screen Editor
Assign a Unique Calendar Color to Each Calendar
