
TABLE OF CONTENTS
- Get the DAKboard APP
- Setting up your DAKboard Android APP Display:
- Device Configuration:
- Frequently Asked Questions:
- Helpful Articles:
A New and Improved version of the DAKboard Android APP is now available. This version of the DAKboard Android APP will turn your Android Tablet, Phone, TV, or other Android device with Play Store access, on Android 8.0, Oreo, or better, into a DAKboard Display by simply linking it to a Device in your account. This article will explain how to use the APP.
Get the DAKboard APP
Open the Google Play Store from your Android Device.

Search for DAKboard and Install the DAKboard Android APP.
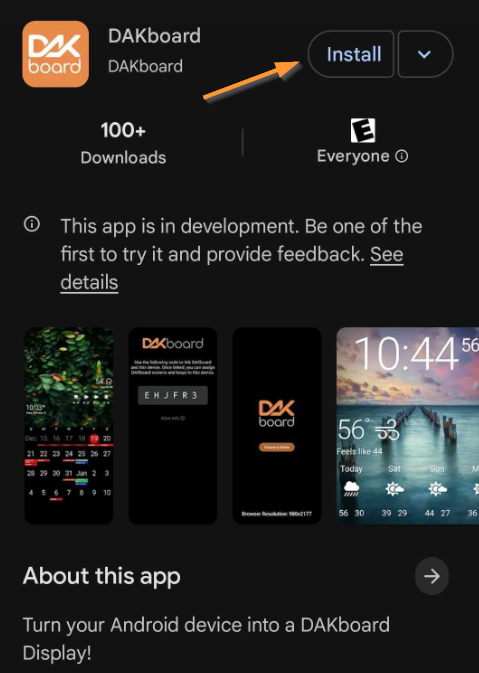
Once installed, you can set this up the same as a DAKOS display.
Setting up your DAKboard Android APP Display:
When starting your DAKboard Android APP, you will see the Link Code page for the first setup. See below:
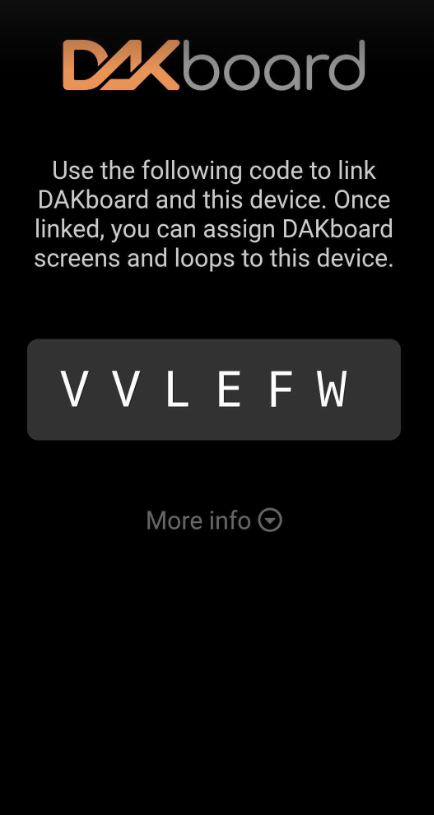
You will need to set up one Display for each Android device you want to link to your account. To do this, follow the steps below:
Linking Your Display:
To link your device, visit the Displays & Devices page and click the green ADD button. Name your new Display, type in your link code, select the screen you want to view, and you're done!

If the link code expires before you complete this step, restart your APP to get a new link code. Once completed, your APP will function the same as any other Display you have linked to your account.
Device Configuration:
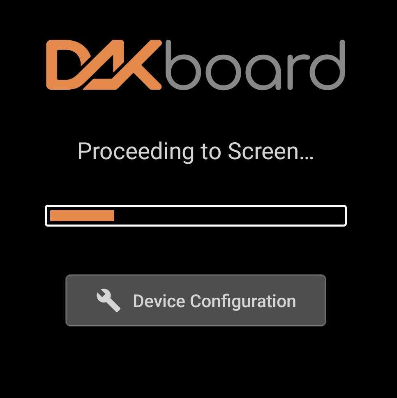
After linking your Display, each time you start your APP, you will see a loading Screen with a Device Configuration button as seen below:
If you have recently upgraded to version 2.10 or above (DAKboard Apps attempt to do this for you, but you may need to redownload them depending on the OS of your device), your loading page may look like this:
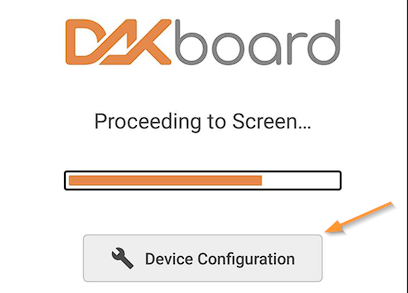
Clicking the Device Configuration button will take you to the DAKboard APP configuration page. Here you will have a few configuration details and tools. See below to learn more:
Device Information and Themes:
We now include a Device Information section and a Light and Dark theme selector, as seen below:
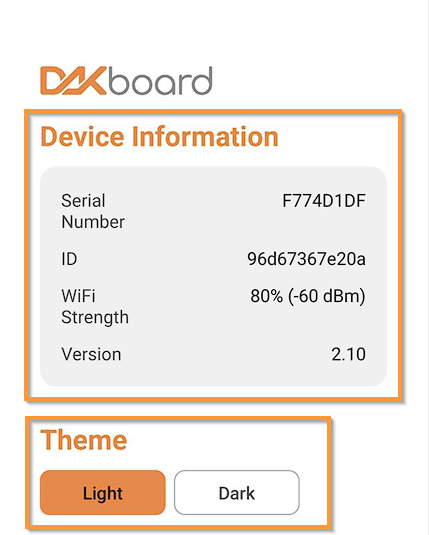
The Device Information section will show you your DAKboard Display serial number so you can match it to your device in your Displays & Devices tab in your account, the Device ID (both can be reset by deleting your device from your Displays & Devices page and recreating it), the current WiFi signal strength your device is detecting where it is located in your network, and the current App Version number. These details are shared with us so we can help you troubleshoot any issues that come up.
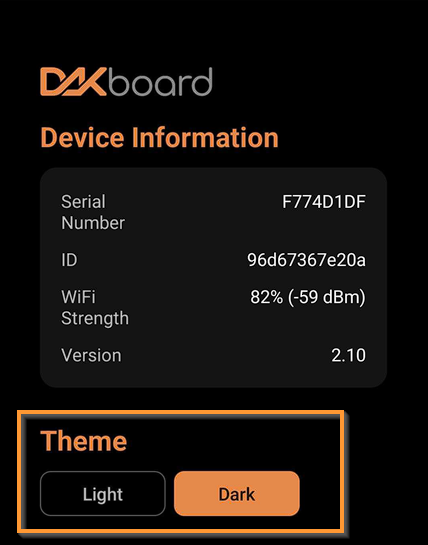
The Theme will allow you to choose a Light or Dark theme for your App. The Light version can be seen above, and the Dark version can be seen below:
Sleep Scheduler:
The Sleep Scheduler is similar to your DAKOS On/Off (Sleep) Scheduler (See our article How to Set the On/Off (Sleep) Schedule for more details). This can be used so you can leave your DAKboard APP running, and it will hide the APP on your screen when it is scheduled to be off.
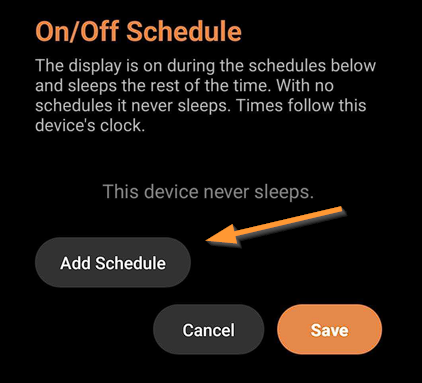
To set up a schedule, click the Add Schedule button:
From here, you can use the Add Schedule tool to create your schedules, as seen below:
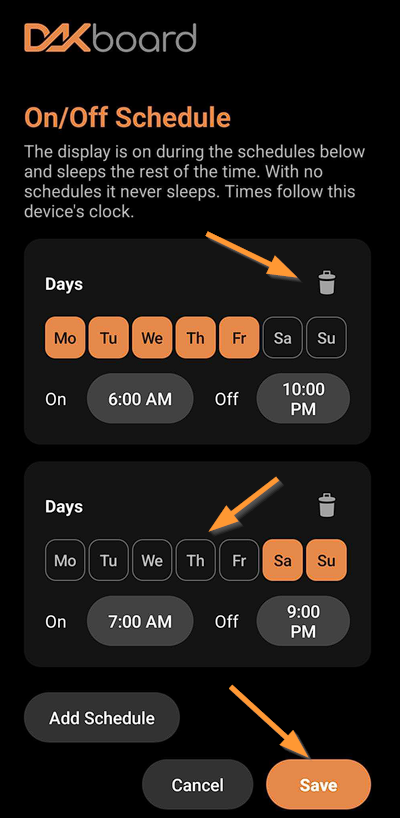
You can select the Days of the week and set the hours to turn your display On and Off. The Trash Can Icon can be used to remove a schedule you no longer want. Make sure to save your changes to apply them to the display.
NOTE: We do not recommend using this on your Android Phones as the Sleep schedule hides your App by darkening your screen. This will make it hard to close the app while it is sleeping.
The On/Off times are set with 15-minute intervals in the On App tools to make this easy to set up on your device. See below:
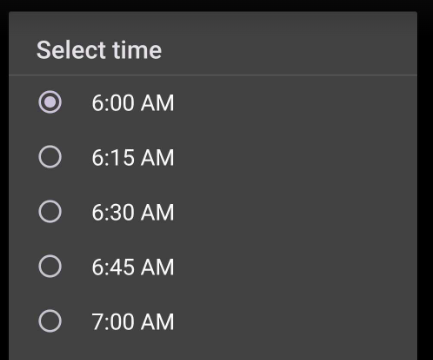
However, if you need to be more specific with your time, like setting it to turn on at 6:05 am, you can do this from your Displays & Devices tab in your DAKboard account. Just find the device with the serial number from your info page, click the 3 dots to the right of the Display, and open the settings page, as seen below:
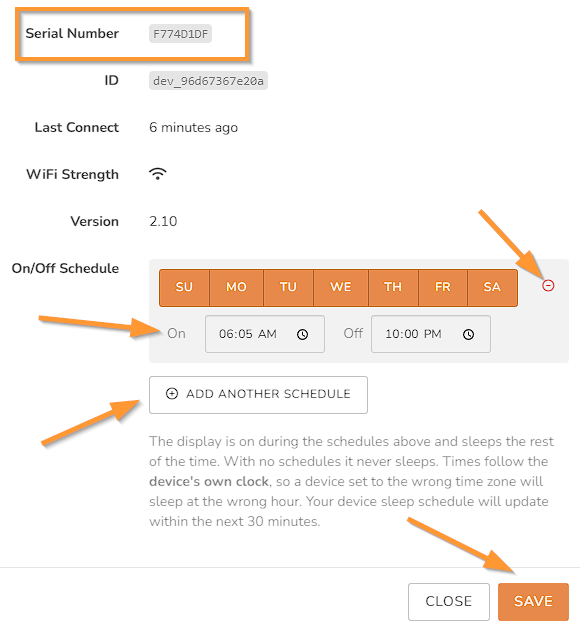
Here you can add a schedule by clicking the Add Another Schedule button, clicking in the On time block, and typing in the time you want to turn it on at. The same will work with the Off time block. As with the tool in the App, you can select the specific days of the week you want this schedule to run on, click the Minus sign next to the days of the week to delete it, and make as many schedules as you would like. Make sure to save your changes to apply them.
NOTE: The display is on during the schedules above and sleeps the rest of the time. With no schedules, it never sleeps. Times follow the device's own clock, so a device set to the wrong time zone will sleep at the wrong hour. After saving your changes here, your device's sleep schedule will update within the next 30 minutes.
Frequently Asked Questions:
Below are the most Frequently Asked Questions about the New Android App:
Will my Screen automatically fit in my App?
The Screen cannot control the resolution of your Device. However, with our new Auto Scaling feature for Custom Screens, your Screen will automatically resize itself to fit your device's resolution. See our article How to Get Your Screen to Fit Your Display for more details.
Does the App work with the Free Subscription and Predefined Screen?
Yes, you can use the App with the Free Subscription and the Predefined Screen. We recommend using the Mobile/Tablet Layout when using the Predefined Screen for best results. See our article How to Use the Predefined Screen Editor for help with its settings and making it fit your App.
Can I edit my Screen with the DAKboard App?
No, the DAKboard app cannot directly edit your Screen. It is designed to act like a display, and does not function fully with your account, so it should not be used to edit your Screen.
Does the App open in Kiosk Mode?
Not Yet. This version does not have a Kiosk mode because that will prevent users from being able to close the app on their Phones. We hope to have a version with a Kiosk mode in the near future.
Can you log into your DAKboard account from the App?
Though it is possible to do so with a Username and Password method, it is not recommended. This is because there would be limited functionality with your DAKboard account due to the lack of OAuth controls with a webview App. It is recommended to log into your DAKboard account through your device's browser instead, as you will have full access to your account and can even use your Google Authenticated account login options.
Helpful Articles:
Having trouble? See if these articles help.
How to Get Your Screen to Fit Your Display
How to Use the Predefined Screen Editor