TABLE OF CONTENTS
- Add SmartThings To Your Custom Screen:
- Setting up Your SmartThings Block:
- Settings Tab:
- Rules Tab:
- Formatting Tab:
- Schedule Tab:
- Frequently Asked Questions:
- Helpful Articles:
With the Custom Screen and your Paid Subscription, you can now link your SmartThings account with DAKboard. This will allow you to view and, in some cases, interact with the states of your SmartThings devices. This article will describe adding a SmartThings block to your custom screen.
Add SmartThings To Your Custom Screen:
Add a SmartThings block to your custom screen by selecting Add a Block while editing your screen, and under the Smart Home section, select SmartThings, or by searching for SmartThings:

To add your SmartThings account to your block, click the Connect To SmartThings button as seen below:

This will open the Authentication page to allow you to connect to your account:

Use the Account Authentication method you use to access your SmartThings account and proceed to log in. Select the Location from the dropdown for the Devices you wish to add, and make sure all the options are selected to grant DAKboard Access to them. See below:

Once you authorize the account, click the Close Tab as seen below to return to your DAKboard account:

Setting up Your SmartThings Block:
Once you have completed the linking of your account, open the SmartThings block Editor tool. Here, you can link a new account or select your SmartThings account from the drop-down, select the device(s) and additional metrics that you wish to add from the Devices section, and choose any of the additional options as seen below.

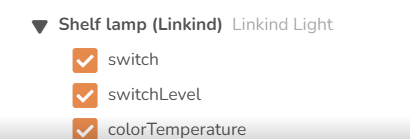
Clicking on the Arrow next to a device will open the device window so you can select the metrics you want to view. See below:
Click Save Changes to apply your selections and preview your screen. Additional settings and options are detailed below.
Settings Tab:
With your SmatThings Block, you have a few optional settings you can use with your Display. This can be seen on the Block editor page under the settings tab. See below:

These settings are as follows:
- Show Name: This option will show the name of the connected device as reported by the API.
- Display Icons: This option will display any icon associated with the item reported by the API.
- Show Type: This option will show what kind of device is being reported by the API.
- Show Battery: This will show the Sensor Battery Level as reported by the API.
- Allow Change of State: This option allows you to use the Touchscreen or a connected USB Mouse to toggle the state of the connected device.
Rules Tab:
With the Rules Tab, you can add effects to your SmartThings Block to alert you when certain thresholds have been reached. See below:

These rules will make your SmartThings block appear more dynamic. It works by making a series of IF/THEN statements and utilizing the options dropdowns in each section. Below is a list of the Options available:
For the IF statements:
- Equals
- Is not Equal
- Is Less Than
- Is Greater Than
- Starts With
- Contains
- Ends With
For the THEN statements:
- Set Text Color
- Set Background Color
- Set Icon
- Set Value
- Hide Value
With the THEN statements, you can also click the AND button to add multiple conditions.
Formatting Tab:
With the Formatting Tab, you can now modify the look of your Block further. These options are detailed below:

- Text: This allows you to select the Size and Color of the Icon.
- Background: This option allows you to fill the background of your block with a color and/or add blurring effects to it.
- Block Title: This allows you to put a title on your block. This can be used to target your block for use with Custom CSS or just to identify the block.
- Advanced: The Advanced dropdown includes new block placement, block shaping, and the Link Block options. See our article Advanced Features of the Custom Screen Editor for further details.
Schedule Tab:
This tab allows you to make it so the block is only visible on the days you want to see it. See our article Content Scheduling to learn how to use this tool.
Frequently Asked Questions:
Below are the most Frequently Asked Questions about the SmartThings Block.
Helpful Articles:
Having trouble? See if these articles help.
How to Use the Custom Screen Live Editor
Advanced Features of the Custom Screen Editor